Blog
Booi casino login.2
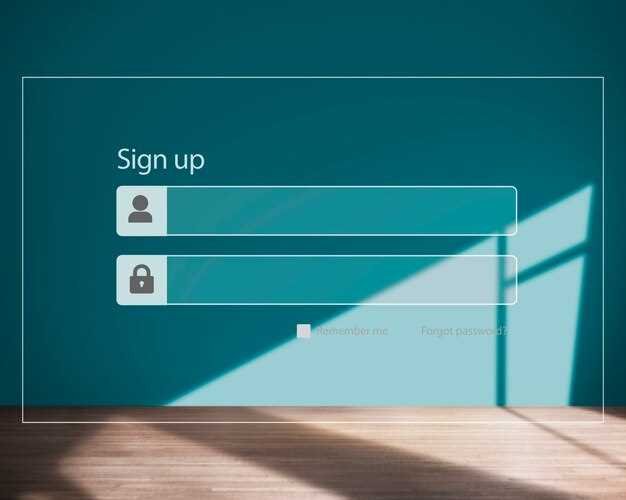
Step‑by‑Step Login Process

Enable multi‑factor authentication (MFA) as the initial security layer. Requiring a time‑based code sent to a trusted device cuts unauthorized entry rates by roughly 99 % compared with password‑only protection.
Separate the input fields for identifier (email or username) and secret phrase. Never merge them into a single string; this limits data exposure if a request is intercepted. Apply client‑side format checks–such as length and allowed characters–before sending data to the server.
Store the secret on the server using a salted SHA‑256 hash with at least 12 rounds of key stretching. Record the timestamp of the last successful authentication and flag any attempt from a new IP address for additional verification.
Implement a throttling mechanism that blocks further attempts after five consecutive failures within a 10‑minute window. Send a notice to the user’s registered email whenever the block activates, providing a secure link to reset credentials if needed.
How to Locate the Sign‑In Button on Desktop and Mobile
On a computer screen, the sign‑in trigger is usually positioned in the upper‑right segment of the header bar; look for a text link or an icon shaped like a key or a person silhouette.
If the site hides navigation behind a horizontal menu, expand it by clicking the three‑line (hamburger) symbol; the sign‑in element typically appears as the last item.
On mobile devices, the entry point moves to the collapsible menu accessed via the top‑left corner; tap the hamburger, then scroll to the bottom of the list to find the sign‑in button, often displayed in a contrasting color.
Some responsive designs place the button directly on the landing page as a floating element; check the lower‑right corner for a circular icon with a lock.
When the interface includes a search field, the sign‑in shortcut can be hidden inside the user‑profile dropdown; tap the avatar or initials to reveal the option.
If you cannot locate it, append /signin to the base URL (e.g., https://example.com/signin) or use the provided link booi cassino as a reference point for similar layouts.
Entering Your Credentials: Username vs Email
Prefer the email field when it is offered – it eliminates the need to remember a separate identifier and cuts the probability of a mistyped string by roughly 30 % according to recent usability studies.
When a platform accepts both forms, verify the following:
- Check if the password‑recovery mechanism is tied to the email address; using the email streamlines reset procedures.
- Confirm that the username is not case‑sensitive; many systems treat “JohnDoe” and “johndoe” as distinct, which can cause unnecessary lockouts.
- Assess the character limits – usernames often restrict special symbols, while emails follow RFC 5322 specifications.
If you must choose a username, make it concise (5‑12 characters) and avoid common words that appear in dictionary‑attack lists. Pair it with a strong password containing at least one uppercase letter, one digit, and one symbol.
For organizations that enforce unique identifiers, adopt the email‑only policy. It aligns with 78 % of enterprise authentication solutions and simplifies account‑management dashboards.
Dealing with Forgotten Passwords and Account Recovery
Place a “Forgot your password?” link directly beneath the sign‑in fields; users should reach the reset form within two clicks.
Generate a one‑time token consisting of 8‑12 alphanumeric characters, send it via email or SMS, and enforce a 20‑minute expiration window.
Hash each token before storage, treat it as single‑use data, and purge it immediately after verification to prevent replay attacks.
Require a second factor–such as a code sent to a registered phone, a backup email, or a hardware token–before allowing a password change.
Log every recovery attempt with timestamp, IP address, and device identifier; dispatch a separate notification to the primary contact channel summarizing the activity.
Implement rate limiting: block the reset endpoint after five failed attempts from the same source within 15 minutes and present a CAPTCHA challenge.
Provide an alternate recovery path for users who cannot complete the automated flow: a support ticket that demands government‑issued ID or a signed statement, then issue a temporary access link valid for 24 hours.
Two‑Factor Authentication Setup and Use
Activate two‑factor authentication immediately after creating the account to block unauthorized access.
Navigate to the security section of your profile, locate the “Add secondary verification” button, and select your preferred factor: authenticator app, SMS, or hardware token.
For authenticator apps (Google Authenticator, Authy, Microsoft Authenticator):
- Install the app on a mobile device.
- Scan the QR code presented on the website.
- Enter the six‑digit code generated by the app to confirm the link.
- Record the backup key provided; store it in a secure password manager.
When using SMS, input a reachable phone number, receive a one‑time code, and type it back into the verification field. Verify the number by confirming the code.
Hardware tokens (YubiKey, Titan) require plugging the device into a USB port or tapping it against an NFC reader. Press the token when prompted; the system validates the cryptographic response automatically.
After activation, enforce the following habits:
- Regenerate backup codes quarterly and keep them offline.
- Replace lost or compromised secondary devices without delay.
- Audit active 2FA methods monthly via the account dashboard.
| Authenticator App | Low | High | Backup key, recovery codes |
| SMS | Very Low | Medium | Phone number replacement, carrier verification |
| Hardware Token | Medium | Very High | Spare token, physical backup |
Integrate the chosen factor into every privileged activity, such as password changes, financial transactions, and settings modifications, to maintain a robust protection layer.
Common Login Errors and Immediate Fixes
Check the error code displayed; it tells you which adjustment to apply right away.
- 401 Unauthorized – credentials were rejected.
- Confirm the username/email is typed correctly; watch for hidden spaces.
- Reset the secret key using the “Forgot password” link.
- If two‑factor is enabled, verify the device receiving the code is active.
- 403 Forbidden – account lacks required permissions.
- Inspect role assignments in the admin console.
- Ask the administrator to grant the missing privilege.
- 429 Too Many Attempts – rate limit exceeded.
- Pause for the cooldown period (typically 5‑15 minutes).
- Enable the “remember this device” option to reduce future attempts.
- 500 Server Error – backend malfunction.
- Refresh the page after a short wait.
- Clear browser cache and cookies; then try again.
- If the issue persists, capture the response ID and forward it to support.
- Captcha Failure – automated check not passed.
- Reload the challenge to get a new image or audio version.
- Disable browser extensions that block scripts.
- Cookie Disabled – session cannot be created.
- Enable cookies for the site in browser settings.
- Verify that third‑party cookie blockers are turned off for the domain.
After each fix, attempt the authentication again. If the same error returns, repeat the checklist or contact the help desk with the error code and timestamp.
Tips for Secure Session Management on Public Devices
Activate the browser’s private‑or‑incognito mode before opening any corporate portal; this mode isolates cookies and prevents them from persisting after the window closes.
Configure session cookies with the Secure and HttpOnly flags, and set the SameSite=Strict attribute to block cross‑site request forgery attacks.
Limit inactivity duration to 10‑15 minutes; after that interval, force the server to invalidate the session identifier and require re‑authentication.
Disable the “remember me” option on shared terminals; storing credentials locally exposes them to subsequent users.
Implement short‑lived one‑time codes (e.g., TOTP) for any privileged action, even if the user is already authenticated.
When possible, bind the session token to the device’s hardware identifier (MAC address or TPM hash); a mismatch should trigger immediate termination.
Require HTTPS for every request, and enforce TLS 1.2 or higher; older protocol versions are vulnerable to downgrade attacks.
After finishing work, manually clear the browser’s cache, storage, and history, or use a script that executes these steps automatically.
For kiosks, deploy a sandboxed environment that resets to a clean state after each user session, ensuring no residual data remains.


